Documents, Contracts, and Invoices
Documents Workspace
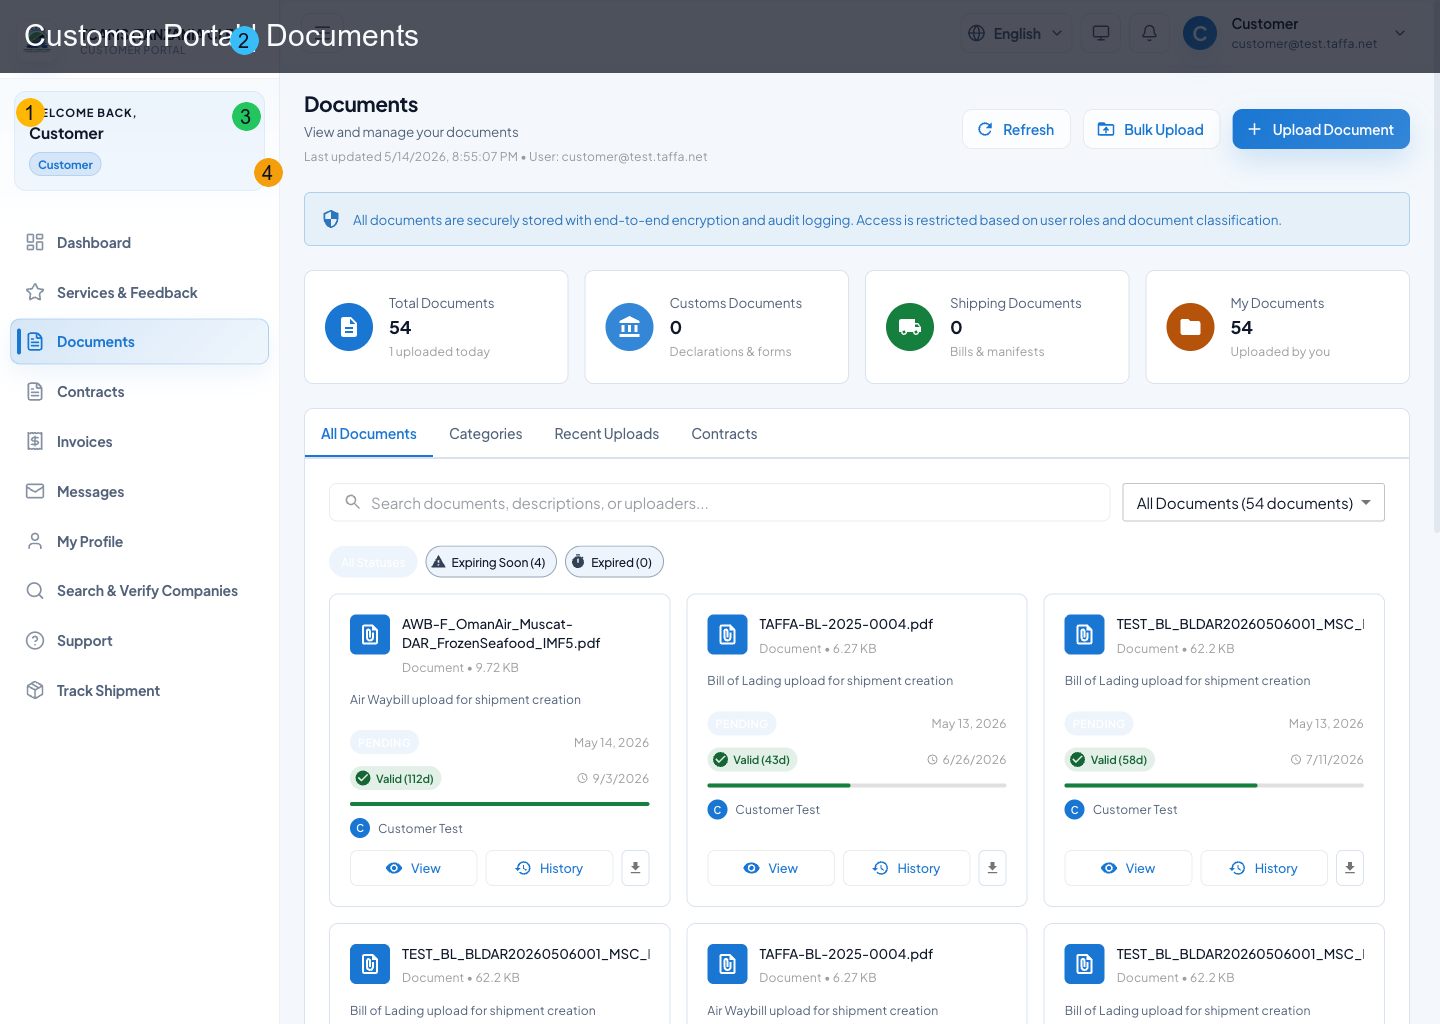
The documents workspace manages customer files and compliance-ready records.
Main capabilities
- search by filename/uploader text
- filter by category
- monitor expiry (all, expiring soon, expired)
- open in-app viewer and download files
- upload single file with metadata
- bulk upload multiple files
- view version history and restore an older version marker
Document tabs
- All Documents
- Categories
- Recent Uploads
- Contracts (embedded contract management view)
Upload constraints
- max upload size: 10 MB per file
- accepted types: PDF, Office docs/sheets, images, text, zip
- visibility options:
PUBLIC,PRIVATE,RESTRICTED
Upload a document safely
- Open Documents, choose the correct document tab or record context, and select Upload.
- Pick the document type that matches the file’s purpose. Do not use a generic type if a specific permit, invoice, or identity category exists.
- Select the file and verify its name, size, and extension before upload.
- Add the related declaration reference supplied by the CFA, contract, or description when the form provides those fields.
- Choose visibility according to the intended audience; use the most restrictive setting that still supports the workflow.
- Submit once, wait for completion, and confirm the new row shows the expected file name, version, and status.
If you upload a replacement, use the version or update action where available so reviewers can follow the document history. Do not delete an earlier file merely to hide a correction; the audit trail may be operationally important.
Contracts
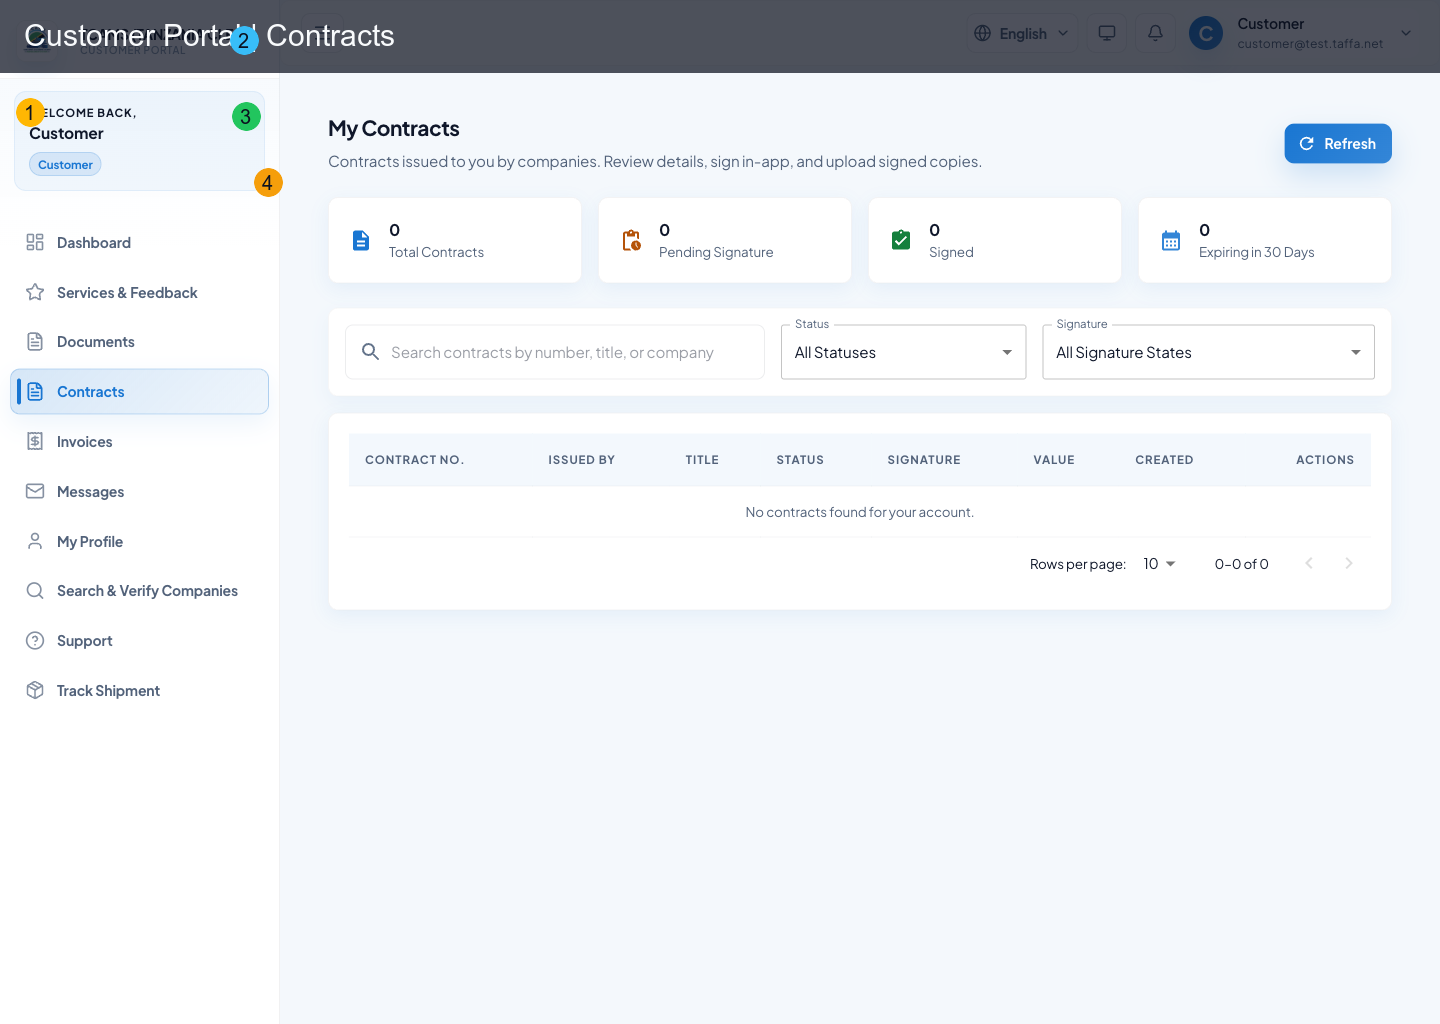
Contracts can be handled directly from customer portal.
Contract actions
- filter by status and signature state
- search by contract attributes
- open details drawer
- preview PDF in-app
- download contract PDF
- sign in-app (digital signing flow)
- upload signed copy manually
Review and sign a contract
- Filter for contracts awaiting your signature and open the details drawer.
- Confirm the parties, service scope, effective dates, amount/currency, and current signature state.
- Preview or download the PDF and read the complete document before taking a signing action.
- Use in-app signing when enabled, or download, sign, and upload the signed copy through the manual path.
- Reopen the record and confirm that the signature state and timestamp changed.
If the displayed terms are wrong, do not sign. Contact the issuing company from the linked conversation or support path and ask for a corrected version.
Contract KPIs
The page summary includes:
- total contracts
- pending signature
- signed
- expiring soon
Invoices
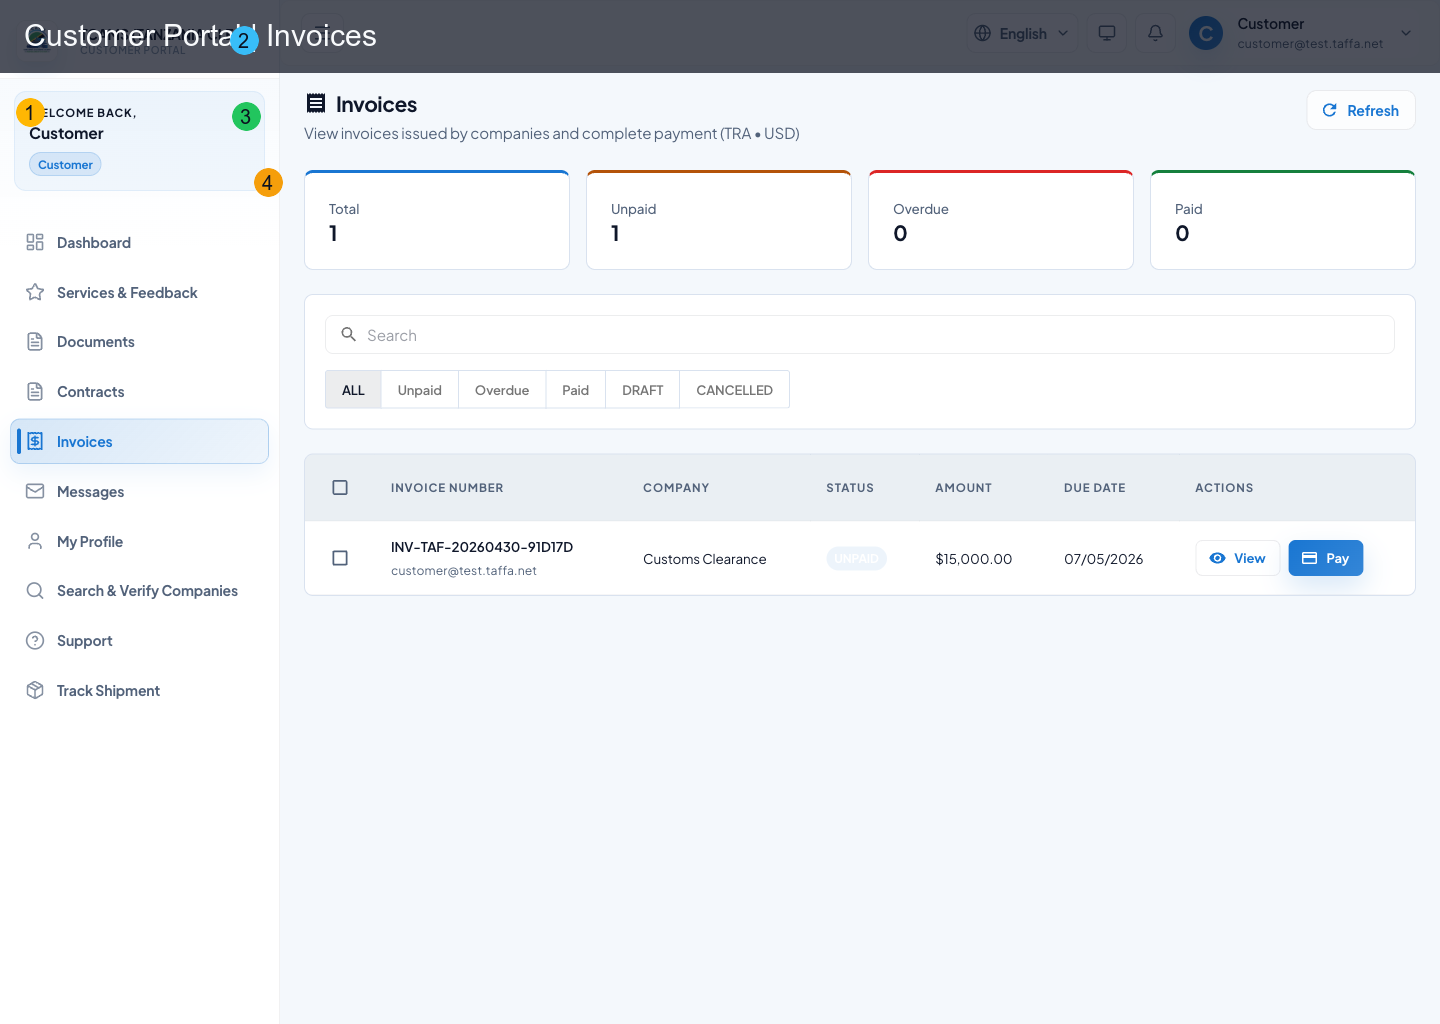
Invoice workflows support both individual and grouped payment operations.
Invoice actions
- search and status filtering (
UNPAID,OVERDUE,PAID,DRAFT,CANCELLED) - view invoice detail and line items
- download/export invoice documents
- pay a single invoice
- pay multiple selected payable invoices in one batch
- refresh after returning from hosted checkout where enabled
Payment behavior
Where hosted checkout is enabled, TCAMS opens the gateway payment page in a new tab. The gateway presents the available payment channels and sends a payment notification back to TCAMS. The customer portal then reflects the updated invoice status after refresh.
Where legacy in-portal payments are enabled, the portal may still show payment method selection. Follow the on-screen payment form used in that environment.
Payment output
After successful payment, a receipt view is generated with:
- receipt number
- timestamp
- amount/currency
- payment method
- invoice reference
Pay and reconcile an invoice
- Open the invoice detail and confirm the issuer, invoice reference, line items, amount, currency, due date, and payable status.
- For bulk payment, select only invoices that belong together and are currently payable; review the batch total before continuing.
- Start payment once. If hosted checkout opens, keep the TCAMS tab available and complete payment only on the recognized gateway page.
- Return to TCAMS and refresh the invoice list after the gateway confirms the transaction.
- Save the receipt and compare its reference, amount, currency, and timestamp with the invoice.
If money was debited but the invoice remains unpaid, do not immediately pay again. Capture the gateway reference and time, refresh once, and raise a support ticket for reconciliation.